
vip@mingyuforklift.com
+86-0535-2090977

Introduction
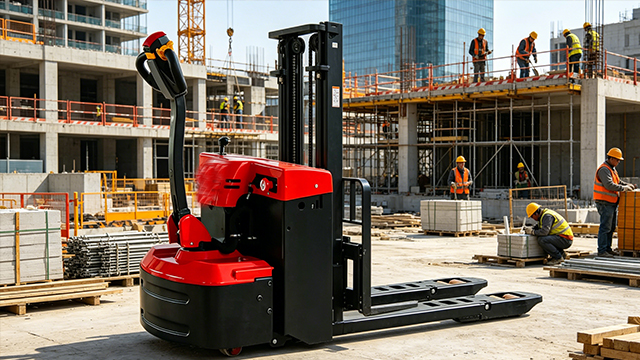
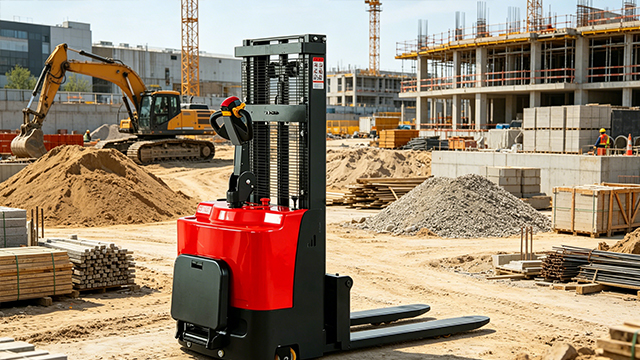
Hydraulic oil leaks in stackers are among the most common and consequential failures in material handling operations. Whether operating a manual hydraulic stacker in a small warehouse or a fully electric unit in a high-throughput distribution center, oil leakage signals a breakdown in the sealed system that powers lifting, lowering, and load positioning functions. A small puddle beneath a stacker is never merely a housekeeping issue—it is a symptom of compromised hydraulic integrity that cascades into safety hazards, operational downtime, and escalating repair costs.
The hydraulic system functions as the muscle of the stacker, converting mechanical energy into the fluid power that raises and lowers loads with precision. When oil escapes this closed system, pressure drops, components overheat, and contaminants infiltrate. Left unaddressed, a minor seal leak can evolve into a scored piston rod, a contaminated pump, or catastrophic cylinder failure—transforming a $50 seal replacement into a $2,000+ overhaul.
This article provides a comprehensive technical guide to diagnosing, troubleshooting, and repairing hydraulic oil leaks in stackers. It covers the root causes of seal failure, systematic diagnostic protocols, repair methodologies, and preventive maintenance strategies that minimize recurrence. By understanding the hydraulic system's architecture and failure modes, maintenance teams can move from reactive patching to proactive management, preserving both equipment reliability and operational safety.
Understanding Stacker Hydraulic System Architecture
Core Components and Their Vulnerability Points
A stacker's hydraulic system comprises several interconnected subsystems, each presenting distinct leak pathways:
The Hydraulic Pump: In electric stackers, a dedicated pump motor drives a gear or vane pump that draws fluid from the reservoir and delivers it to the system under pressure. The pump shaft seal is a primary failure point—wear, internal pump body degradation, or low oil levels causing suction on seals can all result in external leakage at the pump housing. Service documentation identifies shaft seal failure as a common fault, noting that "the shaft seal has worn away," "internal wear of pump body," or "operating at too low an oil level in the tank can cause suction on the seals" as root causes.
The Lift Cylinder: This single-acting or double-acting cylinder converts hydraulic pressure into linear motion to raise the mast and forks. The cylinder consists of a barrel, piston rod, piston seal, rod seal, wiper seal, and gland nut assembly. Each of these components represents a potential leak path. The rod seal holds high-pressure fluid back during extension; the wiper seal scrapes contaminants from the rod surface during retraction; and the piston seal prevents internal bypass between pressure chambers.
Control Valves: Directional control valves, relief valves, and lowering valves regulate fluid flow and pressure. The relief valve limits maximum system pressure to protect components, while the lowering valve controls descent speed. Valve faces, O-rings, and static seals can degrade, causing external weeping or internal bypass that manifests as load drift rather than visible leakage.
Hoses and Fittings: High-pressure hydraulic hoses connect the pump, valves, and cylinders. Hose abrasion, fitting loosening, or seal degradation at connection points create external leak paths. These leaks are often the easiest to identify but can be deceptive—oil dripping from a hose fitting may originate upstream and travel along the hose exterior.
The Hydraulic Reservoir: The oil tank stores fluid at atmospheric pressure (or slight positive pressure via a breather cap). Reservoir leaks typically occur at gasketed seams, sight glass fittings, or fill cap seals. A clogged breather cap can create vacuum conditions that draw contaminants into the system, accelerating downstream seal wear.
Fluid Dynamics and Pressure Considerations
Stacker hydraulic systems typically operate at pressures between 1,500 and 3,000 psi (10-21 MPa), depending on load capacity and design. At these pressures, even microscopic seal imperfections allow fluid escape. The system operates cyclically—pressurizing during lift, holding pressure during load retention, and depressurizing during lowering. This cyclic loading fatigues seal materials over time, particularly at stress concentration points such as seal lips and gland interfaces.
Temperature fluctuations further complicate seal performance. Cold-start conditions increase fluid viscosity, requiring higher pump effort and generating pressure spikes that stress seals. Sustained high-temperature operation—above 180°F (82°C)—causes seal materials to harden and lose elasticity. Service manuals warn that "seal lips are dry and hardened by heat," directly linking thermal degradation to leakage.
Root Cause Analysis: Why Hydraulic Seals Fail
Contamination: The Sandpaper Effect
Contamination is the leading cause of premature seal failure in stacker hydraulic systems. Hydraulic fluid should maintain cleanliness levels of ISO 18/16/13 or better, yet warehouse environments constantly challenge this standard. Dust, metal particles from wear, and moisture enter the system through:
Breather cap failure: A clogged or missing breather cap allows atmospheric contaminants to enter the reservoir during fluid thermal contraction.
Improper fluid handling: Using dirty funnels, open containers, or contaminated top-off oil introduces particulate matter.
Seal degradation byproducts: Worn seals shed particles that circulate and accelerate further wear in a destructive feedback loop.
Once inside the system, microscopic particles become trapped between the seal lip and the piston rod. Every cylinder stroke acts as a grinding cycle, abrading the seal material. As one technical analysis describes, "Those microscopic particles get trapped between the seal and the chrome rod. Every time the cylinder strokes, that grit acts like sandpaper. It eats the seal lip alive". Once the seal lip is compromised, pressurized fluid follows the path of least resistance outward.
Mechanical Damage to Hard Components
Seal replacement without addressing underlying hard-component damage is a common and costly mistake. The piston rod's chrome surface must maintain a mirror finish with surface roughness typically below 0.4 micrometers Ra. Any scratch, ding, or pit creates a serrated edge that slices through new seals within minutes of installation.
Rod damage typically originates from:
Side impacts: Collisions between the mast and racking, or operator-induced lateral loading during fork insertion
Corrosion: Exposure to moisture in outdoor or unheated storage environments causes pitting of the chrome layer
Improper handling: Dropping cylinders during maintenance or using damaged tools during disassembly
A critical diagnostic step involves the "fingernail test"—running a fingernail along the extended rod surface. If the nail catches on any imperfection, the rod requires re-chroming or cylinder replacement before seal installation. As maintenance best practices emphasize, "If the hard parts are bad, you need a new cylinder or a machine shop... A damaged rod will kill the new seal immediately".
Thermal Degradation and Chemical Attack
Standard stacker hydraulic seals use nitrile rubber (NBR) or polyurethane compounds rated for typical operating temperatures. When system temperatures exceed material limits—through overloading, continuous high-duty cycling, or cooling system failures—seals undergo thermal aging:
Hardening: Loss of elastomeric compliance prevents seals from conforming to rod surface micro-geometry
Compression set: Permanent deformation under sustained pressure reduces seal contact force
Chemical breakdown: Oxidation of polymer chains reduces mechanical strength
Service documentation identifies excessive system pressure and low oil levels as primary thermal stressors, noting that "the system operates under too much pressure" and "there is too much wear and tear on the pump" as conditions that elevate oil temperature and accelerate seal degradation.
Seal Aging and Material Fatigue
Even under ideal conditions, seals have finite service lives. Nitrile rubber seals typically last 2,000-4,000 operating hours in clean, temperate environments. Polyurethane seals may extend this to 5,000+ hours but are more sensitive to hydrolysis in moist conditions. Calendar time also degrades seals through oxidation and plasticizer migration, meaning infrequently used stackers may require seal replacement based on age rather than operating hours.
Systematic Troubleshooting Protocol
Phase 1: Symptom Classification and Initial Assessment
Effective troubleshooting begins with accurate symptom identification. Stacker hydraulic issues present in several distinct patterns:
External Oil Leakage: Visible oil on the floor, cylinder exterior, or component surfaces. The leak may be active (dripping during operation) or passive (seeping when static). Location provides critical diagnostic clues:
Oil on the chrome rod below the wiper seal indicates rod seal failure
Oil at cylinder head threads suggests gland static O-ring failure
Oil at hose fittings indicates connection seal degradation or overtightening damage
Oil at the pump shaft seal indicates pump seal or bearing wear
Load Drift (Internal Leakage): The forks slowly descend when raised and holding position. This indicates internal bypass—fluid leaking past the piston seal or through a failing check valve—rather than external seal failure. Internal leaks are safety-critical because they compromise load retention without providing visible warning.
Slow or Erratic Lifting: Insufficient lift speed or jerky motion suggests air in the system, low fluid level, pump wear, or internal leakage reducing available pressure. Troubleshooting tables identify "oil leakage in the pipeline or the connector," "low oil level in the tank," and "inner leakage of lifting cylinder" as primary causes of poor lift performance.
Abnormal Noise: Cavitation noise (high-pitched whining) indicates low fluid level or restricted inlet lines. Mechanical grinding suggests pump wear or contamination-induced damage.
Phase 2: External Leak Diagnosis
Step 1: System Cleaning
Before attempting leak source identification, thoroughly degrease all hydraulic components. Accumulated grime obscures leak origins and creates false positives as oil migrates along surfaces. Use a commercial degreaser and lint-free cloths, then operate the stacker through several lift/lower cycles to activate the leak.
Step 2: Pressurized Inspection
Raise the forks to maximum height and briefly hold against the relief valve to achieve maximum system pressure. Examine each component systematically:
Cylinder gland area for rod seal weeping
Cylinder barrel seams for structural cracks
Hose routing for abrasion points or fitting leaks
Pump housing for shaft seal seepage
Valve bodies for casting porosity or gasket failure
Step 3: Component Isolation
For multi-cylinder systems (tilt, side-shift, or reach functions), isolate individual circuits using manual shutoff valves or by disconnecting and capping lines. This narrows leak sources to specific subsystems.
Phase 3: Internal Leak Diagnosis
Internal leaks require indirect detection methods since fluid does not escape the system:
Load Drift Test: Raise a rated load to maximum height and measure descent rate over 10 minutes. Acceptable drift is typically less than 2 inches (50mm) per 10 minutes. Excessive drift indicates piston seal or valve failure.
Pressure Hold Test: Connect a pressure gauge to the lift line, raise the forks, and shut off the pump. Monitor pressure decay rate. Rapid pressure loss confirms internal leakage.
Thermal Imaging: Infrared cameras can detect temperature differentials at internal leak points, where fluid turbulence generates localized heating.
Component-Specific Repair Procedures
Cylinder Seal Replacement
Cylinder rebuild is the most common stacker hydraulic repair. The procedure requires precision to prevent post-repair leakage:
Disassembly: Secure the cylinder in a vise with soft jaws. Relieve any residual pressure, then remove the gland nut using a spanner wrench. Extract the piston rod assembly carefully to avoid scratching the rod surface on the barrel edge. Remove the piston from the rod, noting the orientation of all seals and wear rings.
Inspection: Measure the rod diameter at multiple points to check for taper or out-of-roundness. Inspect the barrel bore for scoring, corrosion, or dimensional changes. Check the gland nut threads for damage. Replace any component failing dimensional specifications.
Seal Installation: Clean all components with lint-free cloths and compatible solvent. Lubricate new seals with clean hydraulic fluid before installation—never use petroleum-based greases that may degrade seal compounds. Install seals in the correct orientation; rod seals typically face the pressure side, while piston seals may be bidirectional or unidirectional depending on design.
Reassembly: Reassemble in reverse order, torquing gland nuts to manufacturer specifications. Overtightening crushes seals; undertightening allows leakage past static seals. Cycle the cylinder several times after installation to seat seals and purge air.
Pump Shaft Seal Replacement
Pump shaft seal failure requires pump removal from the motor or power unit. The procedure involves:
Disconnecting hydraulic lines and draining the reservoir
Removing the pump from its mounting bracket
Extracting the old seal using a seal puller—avoid screwdriver damage to the seal bore
Cleaning the seal bore and shaft surface meticulously
Installing the new seal squarely using a seal driver of appropriate diameter
Reassembling and verifying shaft rotation freedom before hydraulic connection
Service manuals emphasize that "during installation, the seal is cut at the shoulder of the pump or keyway" as a common installation error leading to immediate leakage. Careful alignment and proper tooling prevent this failure mode.
Valve Repair and Adjustment
Relief valves and lowering valves require specialized knowledge for proper adjustment. Manufacturer service manuals specify pressure settings, and improper adjustment risks component damage or safety hazards. As one manual cautions, "It is allowed to adjust the pressure valve only from trained service technicians".
Valve seal replacement typically involves:
Removing the valve from the manifold
Disassembling the valve body and extracting worn O-rings and seat seals
Inspecting valve spools for scoring or galling
Replacing all soft seals regardless of apparent condition
Reassembling with correct torque sequences and verifying smooth spool operation
Hose and Fitting Service
Hydraulic hose replacement requires matching pressure ratings, bend radii, and end configurations. Critical considerations include:
Pressure rating: Replacement hoses must meet or exceed system maximum working pressure
Compatibility: Hose compounds must resist the specific hydraulic fluid type (mineral oil, biodegradable, or fire-resistant)
Routing: Avoid sharp bends, abrasion points, and heat sources in hose routing
Fitting torque: Follow manufacturer torque specifications; overtightening deforms fittings and creates leak paths
Thread sealant selection is particularly important. As maintenance guidance warns, "Professional mechanics generally avoid Teflon tape on hydraulic threads because if a tiny shred of that tape breaks off, it travels downstream and clogs a valve orifice". Liquid hydraulic thread sealants or reliance on O-ring face seals (ORFS) and JIC flare fittings provide safer alternatives.
System Flushing and Fluid Management
When to Flush
Any significant contamination event—seal debris, water intrusion, or particulate contamination—necessitates system flushing. Additionally, fluid replacement is required when:
Fluid appears milky (water contamination)
Fluid is black or smells burnt (thermal degradation)
Fluid feels gritty between fingers (particulate contamination)
Fluid analysis reveals elevated particle counts or oxidation byproducts
Flushing Procedure
Drain: Remove all old fluid from the reservoir, cylinders, and lines. Drain cylinders by cycling to full extension and retraction with lines disconnected.
Clean: Wipe the reservoir interior to remove sludge and deposits. Replace the suction strainer and return line filter.
Charge: Fill with manufacturer-specified hydraulic oil to the correct level—check with forks lowered, as elevated positions displace fluid into cylinders.
Purge: Cycle all functions repeatedly without load to expel air. For manual stackers, pump the handle rapidly with the relief valve open; for electric units, operate lift/lower cycles with the bleed screw slightly loosened at the cylinder top until oil flows without bubbles.
Verify: Check for leaks, abnormal noise, and proper function under rated load.
Fluid Selection and Maintenance
Hydraulic fluid selection balances viscosity requirements, temperature range, and compatibility with seal materials. Typical stacker systems use ISO VG 32 or 46 mineral oils in temperate climates, with VG 68 for high-temperature applications. Biodegradable fluids may be required for environmentally sensitive operations but require seal material compatibility verification.
Fluid level checks should occur daily or per-shift, with the forks in the lowered position to ensure accurate measurement. Reservoir sight glasses or dipsticks provide quick visual verification. Low fluid levels cause pump cavitation, seal suction damage, and accelerated wear.
Preventive Maintenance Strategies
Daily Operator Inspections
Pre-shift inspections by operators represent the first line of defense against hydraulic failures. Checklists should include:
Visual inspection for external leaks beneath and around the stacker
Hydraulic fluid level verification
Functional test of lift, lower, and hold functions
Listening for abnormal pump noise or cavitation
Checking for fork drift during the hold test
Operator training should emphasize that "oil leakage of hydraulic fluid can cause failures and accidents," reinforcing the safety implications of seemingly minor leaks.
Scheduled Maintenance Intervals
Manufacturer service manuals specify maintenance frequencies based on operating hours:
Every 50 hours (weekly): Hydraulic fluid level check, external leak inspection, filter condition check
Every 200 hours (monthly): Hydraulic oil condition assessment, hose and fitting torque verification, cylinder rod surface inspection
Every 600 hours (quarterly): Hydraulic system pressure test, filter replacement, comprehensive seal inspection
Every 1,200 hours (semi-annually): Hydraulic oil replacement, cylinder seal inspection with measurement, pump performance test
Contamination Control
Implementing rigorous contamination control extends seal life and reduces leak frequency:
Breather caps: Replace or clean regularly; consider desiccant breathers in humid environments
Fluid handling: Use dedicated, sealed transfer containers; never use open buckets or dirty funnels
Filter maintenance: Replace suction strainers and return filters per schedule; monitor differential pressure indicators
Seal storage: Store spare seals in original packaging away from heat, ozone sources, and direct sunlight
Environmental Controls
Where possible, mitigate environmental stressors:
Temperature management: Avoid operating in extreme temperatures; allow cold-soak periods before high-load operation
Cleanliness: Keep warehouse floors clean to reduce airborne dust; position stackers away from machining or grinding operations
Operator training: Prevent side-loading and impact damage through proper operating technique
When to Repair vs. Replace
The decision between cylinder rebuild and replacement depends on component condition and economics:
Rebuild When:
Rod surface is undamaged with mirror finish
Barrel bore is within dimensional tolerance
Gland threads are intact
Unit is relatively new with available seal kits
Replace When:
Rod is scored, pitted, or bent
Barrel shows ballooning from overpressure
Repair labor exceeds 60% of replacement cost
Component is obsolete with unavailable parts
As maintenance economics dictate, "The labor cost to tear it down, hone the barrel, and re-chrome the rod often costs more than just buying a replacement unit. Plus, with a new unit, you get a warranty".
Conclusion
Hydraulic oil leaks in stackers are never trivial maintenance items—they are early warnings of systemic degradation that, if ignored, cascade into catastrophic failures and safety hazards. The troubleshooting framework presented here moves maintenance teams from reactive symptom-chasing to structured root-cause analysis, addressing contamination, mechanical damage, thermal stress, and material aging as interconnected failure drivers.
The repair procedures emphasize precision over speed: clean components before disassembly, inspect hard parts before installing soft seals, and verify system integrity before returning equipment to service. The temptation to simply top off fluid and defer repair must be resisted—"if oil is getting out, dirt is getting in," and the resulting contamination will destroy pumps and valves far more expensive than the original seal.
Preventive maintenance, grounded in daily operator vigilance and scheduled professional service, transforms hydraulic system management from crisis response to predictable asset care. As the industry continues evolving toward electro-hydraulic and fully electric lift systems, the fundamental principles of seal integrity, fluid cleanliness, and pressure management remain constant. For fleet managers and maintenance technicians, mastering these principles ensures that stackers remain reliable, safe, and productive components of the material handling ecosystem.
Name: selena
Mobile:+86-13176910558
Tel:+86-0535-2090977
Whatsapp:8613181602336
Email:vip@mingyuforklift.com
Add:Xiaqiu Town, Laizhou, Yantai City, Shandong Province, China