
vip@mingyuforklift.com
+86-0535-2090977

Safety First: Prerequisites for Any Cover Opening
Before attempting to open the hood or cover on any Toyota forklift, strict adherence to safety protocols is mandatory to prevent injury, electrical shorts, or damage to the machinery.
1. Pre-Operation Safety Checklist
Parking: Move the forklift to a designated, level, and well-ventilated maintenance area.
Neutral/Park Brake: Ensure the transmission is in neutral (IC trucks) and the parking brake is firmly set.
Lower Forks: Fully lower the mast and forks to the ground or rest position
Key Off: Turn the ignition key to the OFF position and remove it from the switch. This prevents accidental starting of the engine or activation of the hydraulic pump.
Disconnect Power (Electric Trucks ONLY): For electric models, locate and disconnect the main battery plug (often a large gray or red industrial plug) to completely de-energize the truck’s systems, eliminating the risk of a high-voltage arc.
2. Personal Protective Equipment (PPE)
Appropriate PPE must be worn, especially when accessing the battery or engine compartment:
Safety Glasses: Essential to protect against potential fluid splashes (oil, coolant, battery acid).
Gloves: Chemical-resistant gloves are recommended when handling batteries or corrosive liquids.
Steel-Toe Boots: Standard requirement in a maintenance environment.
Metallic Jewelry: MUST be removed when working near the battery terminals or electrical components to prevent short circuits and severe burns.
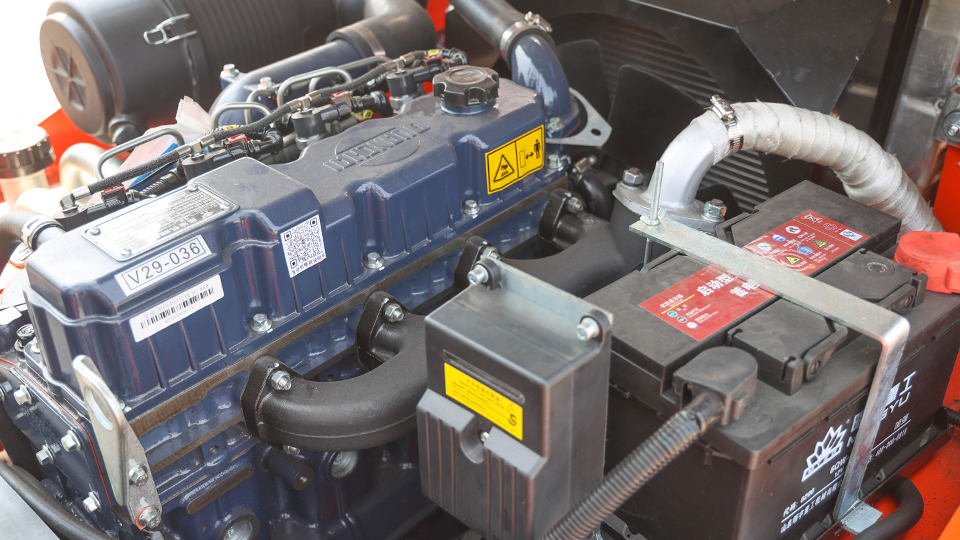
⛽ Part I: Opening the Hood on Internal Combustion (IC) Forklifts
Internal Combustion (IC) Toyota forklifts (powered by LPG, gasoline, or diesel) typically use a single, large, rear-hinged hood that covers the engine and related systems. The most common modern series are the 7-Series, 8-Series, and 9-Series.
A. The Standard Procedure (Toyota 8-Series 8FG/8FD/8FGU)
The Toyota 8-Series and subsequent models utilize a hinged engine hood that often incorporates the operator's seat cushion and the critical Operator Presence Sensing (OPS) seat safety switch mechanism.
Step 1: Prepare the Operator Compartment
Lower Armrest/Console: If equipped with a side console or mini-lever control console, ensure the armrest is lowered or the console is fully down to clear the seat/hood assembly during lifting.
Move the Seat: Slide the operator seat fully forward using the standard seat adjustment lever. This ensures necessary clearance at the rear pivot point of the hood.
Step 2: Locate the Release Latch
The engine hood release mechanism is usually a manual, recessed lever or T-handle located on the lower left-hand side of the operator compartment, often integrated into the side dash panel or floorboard structure near the left knee.
Action: Firmly pull the release lever backward (toward the rear of the truck) or upward (depending on the design) to disengage the main latch mechanism. A distinct click or clunk should be heard as the hood unlatches.
Step 3: Lift and Secure the Hood
Lift the Hood: Immediately after releasing the latch, grasp the rear edge of the seat/hood assembly and gently lift it upward and backward. The hood pivots at the rear hinges, exposing the engine compartment.
Verify Damper Lock (Critical Safety Step): Modern Toyota IC forklifts are equipped with hydraulic or gas spring dampers (struts) to assist in lifting the hood and holding it open. You must verify visually and physically that both the left and right dampers have fully extended and are securely locked into place.
CRUSH HAZARD WARNING: Never work in the engine compartment until the hood is positively secured by the functional dampers. A hood drop can cause severe injury. If the dampers are weak or leaking, they must be replaced immediately.
Step 4: Closing the Hood
Release Dampers (If necessary): Some older damper designs may require a slight upward push or a manual release pin to unlock. Newer Toyota models often allow for the hood to be simply pulled down with force.
Close Slowly: Guide the hood smoothly downward until it is near the closed position.
Secure Latches: Press down firmly on the hood in the area of the latches (usually two locations toward the front of the seat) until both latches audibly click and securely lock into their catches.
Restore Position: Return the seat and any lifted armrests or consoles to their original driving position.
B. Variations and Older IC Models (7-Series and Compacts)
Release Location: On some 7-Series or compact models, the release lever might be positioned further toward the center or require a different direction of pull. Always consult the specific operator manual.
Mechanical Prop Rods: Very old models may lack hydraulic dampers. These require a manual prop rod (a metal bar) to be secured into a designated slot on the chassis. Always ensure the prop rod is firmly engaged at both ends.
Side Access Panels: Compact IC models may use smaller side panels secured by bolts or quarter-turn fasteners for access to specific components (e.g., oil filler, air filter) rather than the main engine hood.
⚡ Part II: Opening the Cover on Electric Forklifts
Electric Toyota forklifts (e.g., 8FBCU, 8FBEH) do not have an engine hood, but a heavy-duty Battery Cover and separate Controller Access Covers. The battery cover opening procedure is significantly different due to the immense weight of the industrial battery.
A. Battery Compartment Access (The Main Cover)
The battery compartment cover on electric counterbalance trucks is the primary access point for maintenance, watering the battery, and checking connections. The operator's seat and floor plate are typically integrated into this cover assembly.
Step 1: Pre-Safety Protocol (Absolutely Crucial)
Key OFF: Remove the key.
Main Disconnect: DISCONNECT THE MAIN BATTERY PLUG. This is a high-voltage system; failing to disconnect the plug risks severe injury from arcing or short circuits.
Step 2: Locate the Battery Cover Release
The release mechanism for the battery cover must be heavy-duty to handle the cover's substantial weight. It is typically a large, visible latch or two separate latches located on the top surface of the floor plate/battery cover or on the side of the chassis.
Common Locations:
Side Release Lever: A large, distinctive handle or lever located on the side panel (often the left side) of the truck, near the counterweight. Pulling this lever releases the locking mechanism.
Latches on Cover: Some models use two robust latches recessed into the floor plate itself.
Step 3: Lift and Secure the Cover
Lifting Assist: Modern electric Toyota trucks are equipped with a specialized, heavy-duty gas strut or damper specifically designed to assist in lifting the heavy cover/seat assembly and the weight contribution of the battery.
Lift Up: Grasp the cover (usually a handle or the rear of the seat) and lift firmly upwards. The damper should engage and allow the cover to pivot open, providing vertical access to the battery.
Confirm Secure: Verify that the heavy-duty strut is fully extended and securely locked. The potential energy stored in this massive cover assembly makes a sudden drop extremely dangerous.
B. Controller Access (Side or Front Panels)
Electric trucks also feature separate panels to access the electronic systems:
Controller Cover: Often located on the side of the chassis or a front lower panel near the mast base. These covers protect the main electronic controllers, main contactors, and sometimes the hydraulic pump motor.
Mechanism: These panels are typically lighter and secured by quarter-turn fasteners, small bolts, or wingnuts. They are designed for quick access for diagnostics and motor checks but do not involve the seat or battery compartment.
�� Technical Component Deep Dive and Maintenance
Proper functioning of the hood/cover components is a maintenance issue as much as an operational procedure.
1. The Latch/Lock Assembly
Issue: A latch that is stiff, sticky, or difficult to engage/disengage.
Maintenance: The latch mechanism and the striker plate (the receiving component on the chassis) must be periodically inspected for damage and lubricated with an appropriate high-quality, non-gumming grease. Cable-operated latches should be checked for cable stretch or kinking.
2. The Hood/Cover Damper (Gas Strut)
Issue: The hood requires excessive manual effort to lift, or, most critically, it fails to stay open securely.
Safety Implication: A failed damper poses an unacceptable crush hazard. If oil residue is visible on the strut body or it feels spongy, it is failing.
Maintenance: Dampers have a finite lifespan and must be replaced immediately upon showing signs of weakness. Always use a Toyota Genuine Part specified for the exact model, as the damping force and dimensions are precisely calibrated to the assembly weight.
3. Hinge and Seal Integrity
Hinges: Hinges for both IC and Electric covers should be periodically lubricated to ensure smooth, controlled movement. Rough movement can place undue stress on the damper.
Seals: The rubber or foam seals around the edge of the hood/cover prevent the ingress of dirt, dust, and moisture into the engine or controller compartments. Damaged seals should be replaced to protect sensitive components.
�� Summary of Key Steps
|
Forklift Type |
Location of Release |
Lifting Mechanism |
Critical Safety Check |
|
IC (Gas, LPG, Diesel) |
Left side of operator compartment (recessed lever). |
Rear-hinged with hydraulic/gas struts. |
Confirm both dampers are fully locked. |
|
Electric (Battery) |
Side panel or recessed into the top/floor plate. |
Heavy-duty strut/damper. |
DISCONNECT MAIN BATTERY PLUG. |
Best Practice: Always consult the specific Operator’s Manual for the exact Toyota model and serial number. This documentation provides precise details on the latch location, lifting points, and specific safety warnings for that machine. Safe and proper hood access is the foundation of effective forklift preventative maintenance.
Name: selena
Mobile:+86-13176910558
Tel:+86-0535-2090977
Whatsapp:8613181602336
Email:vip@mingyuforklift.com
Add:Xiaqiu Town, Laizhou, Yantai City, Shandong Province, China